Sunday, August 14, 2011

Summer's Epilogue - August GBBD

Black-eyed Susan, Rudbeckia fulgida var. speciosa
There are those that believe that flowers and plants feel, communicate, and even, speak. They speak in a language perhaps only a gardener can understand. Blooming plants obviously speak loudly and clearly with their colorful and textural flowers. What are they saying? 'Here I am!' or 'I am beautiful!,' perhaps. Their blooms speak to insects, to animals, and to people, saying various things that would seem appropriate to each.

Knock-out roses
They also say different things at different times of the year--speaking other words in spring than in summer or fall, depending upon their seasonal stage of development. At this time of year in my garden, they are speaking their Summer Epilogue, a last word before the preparations for fall.

Black-eyed Susan, Rudbeckia fulgida var. speciosa
Many summer blooms have gone or are going to seed. Even in their shedding of petals there is a beauty in the changing hues and growing seedhead. The singed edges curl up to give that last dance of shape and color.

Echinacea purpurea, Kim's Knee High
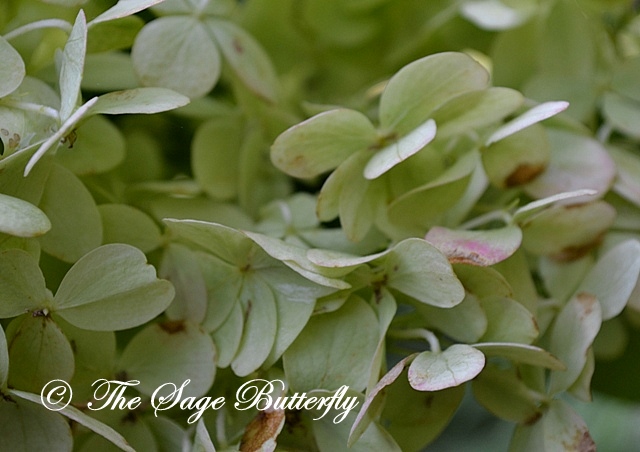
Some have chosen to wait for their epilogue, still transforming colors from white to pink to burgundy or white to green to green/pink. They take their brush and outline the edges to display a subtle surprise.

Hydrangea paniculata 'Vanilla Strawberry'

Hydrangea paniculata 'Limelight'

Hydrangea paniculata 'Limelight'
Some are reaching their peak of color, waiting for this time to shout a vibrant burst into the sky.

Crape Myrtle


Mandevilla, Yellow

Caladium, 'Postman Joyner'

Penta variegata
Even the night bloomers are reaching their peak, sending out multiple blooms with heavenly fragrance.

Moonflower, Ipomoea Alba


The annuals are at their best at this time of year--full and lush.

Impatiens
The warm weather crops are slowing their production but are still sending out lots to pick and eat.

Tomato, raspberry, okra, pepper, squash
By this time, I am beginning to adjust to the changing of flowers to seed. I look forward to the cooler weather to come with a host of other colors of nature to cherish. I begin to welcome the end of the summer garden and the beginning of the autumn garden. Time slows a bit and there is less to do to maintain the garden but more to do to change or start a bed and to prepare for fall.

It is Garden Bloggers' Bloom Day over at May Dreams Gardens. Visit her to see what other garden bloggers have blooming.
©Michelle A. Potter

Wednesday, August 10, 2011

The Giant Zucchini Dilemma


Every morning, as I enter my vegetable garden and gather tomatoes, beans, okra, peppers, cucumbers, squash, and zucchini, I search through the foliage to find the ripened ones to pick. Once in a while I miss a zucchini or squash because it has grown, unbeknownst to me, under the stem or so close to it that it is well-camouflaged. One such zucchini escaped my picking for quite a while to grow to about a foot long before I finally saw it bulging from beneath the zucchini plant stem.


I try to pick my zucchini when it is small because the flavor and texture is so much better, however this one hid from view. When this happens, I know there will be lots of unappetizing seeds in the center of the zucchini, so I scoop them out.


This zucchini will be stuffed and baked.


Stuffed Zucchini

1 large zucchini, halved
½ cup zucchini, chopped
½ cup tomatoes, chopped
1 onion, chopped
1 small green pepper, chopped
2 cloves garlic, diced
½ cup panko crumbs
¼ cup grated Parmesan cheese

Preheat oven to 350° F.  Scoop out seeds from zucchini halves. Bake halves on lightly greased pan for 30 to 35 minutes.

In the meantime, saute zucchini, tomatoes, onions, peppers, and garlic until soft.


Transfer to mixing bowl. Add panko crumbs and Parmesan cheese and mix.


Add mixture to baked zucchini halves.


Bake stuffed zucchini for 30 to 35 minutes or until zucchini halves are tender.


Note:  The amount of ingredients may vary depending on the size of the zucchini.


©Michelle A. Potter

Wednesday, August 3, 2011

Sun-dried or Oven-dried Tomatoes

I usually grow a lot of tomatoes because they are delicious, good with so many dishes, and I like their flavor very much. One of the ways I like to enjoy tomatoes is to dry them in the sun. This is an easy way to preserve them and bring out their tangy flavor.


With the temperatures ranging between 90 and 102 degrees Fahrenheit, this is perfect weather for drying tomatoes.

Method for Sun Drying:

Lightly grease cookie sheets or shallow pans.

Slice tomatoes about 1/8-inch to 1/4-inch thick (if you slice too thinly, the slices will be too thin to be of substance).

Spread slices in pans.

Place pans in a very sunny area for two to three days. (You can store the pans in the oven overnight.)

If you are worried about insects or debris, place a screen or fine netting over the pans without touching the tomatoes.


Method for Oven Drying

Sprinkle cut sides of tomatoes with salt. Place tomatoes on cheesecloth or dishtowel to drain for one hour.

Lightly grease cookie sheets or shallow pans.

Spread slices in pans.

Place pans in an oven at a temperature of 130 degrees to 165 degrees Fahrenheit for six to 12 hours.


The tomatoes are dry when there is no more moisture in the slices. The tomatoes will not be crispy but stiff and pliable like fruit roll-ups.


You can use them in salads, soups, casseroles, and other dishes. In most cases, the tomatoes need to be reconstituted by soaking in water for about 30 minutes. Instead of water, broth, wine, or some other sauce can be used to reconstitute. In salads and pastas, the dry tomatoes can be chopped and sprinkled over the salad or pasta dish.


I usually freeze my sun-dried tomatoes, but they can also be packed in oil. To pack them in oil, fill a sterilized jar with tomatoes and oil. Garlic and herbs may be added as well.

I am joining A Little Bit of Spain in Iowa for Simple Lives Thursday.
©Michelle A. Potter


Tuesday, August 2, 2011

Thursday, July 28, 2011

My New Herb Garden


For many years, I have wanted an herb garden--a designated area just for herbs. Currently, I use many herbs in the vegetable garden for companion planting, but sometimes they get too large and take up valuable gardening space. I also have herbs scattered around the flower beds because I like herbs mixed with flowers and other plants and they also act as pest deterrents.

A few weeks ago, we finally began work on our herb garden. The space we selected is near the back entrance of the house for easy access. It will be nice to quickly run out and snip a few herbs for cooking. This spot was a grassy area where grass struggled to grow because of the repeated traffic to and from the patio. Here is the before photo:


We started by laying out the cross path to have four quadrants. The stepping stones are 16 inches square. We doubled the paths to have ample room for getting something large on and off the patio, so each path is 32 inches wide. My husband lays these stones so well. He digs them in and places them on crusher run. After the path was complete, we set edgers around the herb beds up to the path in each quadrant.  I planted some Sky Pencil Japanese holly (Ilex crenata) at one edge to camouflage the wooden stairs.

Herbs I planted in the beds:


Sweet Basil - Ocimum basilicum


Osmin Purple Basil


Rosemary - Rosemarinus officinalis


Spicy Globe Basil


Thai Basil - O. basilicum thyrsiflorum


Variegated Basil - Ocimum x citriodorum 'Pesto Perpetuo'


Sage - Salvia officinalis  *  Dill - Anethum graveolens  *
 Variegated Sage - Salvia officinalis 'Tricolor'  * Parsley - Petroselinum crispum 


The finished herb garden...


Other herbs I have since added to the herb garden are garlic chives, Italian parsley, and fennel. I may add some additional herbs over the coming weeks. As the Japanese hollies grow, they should change the view of the stairs.

I look forward to using these herbs for cooking and herbal teas. I will relish the opportunity to find so many so near.

I am joining Frugal Friday at  The Shabby Nest

and Home and Family Friday at Home is Where My Story Begins.
©Michelle A. Potter

Wednesday, July 27, 2011

Related Posts Plugin for WordPress, Blogger...
ondragstart="return false" onselectstart="return false"