Materials and Supplies
Portland cement
Peat moss
Perlite
Wheelbarrow
Tarps
Gloves
Apron or old clothing
Mask (if you are sensitive to cement dust)
Hypertufa forms (styrofoam, plastic, cardboard, wood)
First, she set out a wheelbarrow on a large tarp for us to mix the ingredients.

1 part Portland cement
1 1/2 parts peat moss
1 1/2 parts perlite

We thoroughly mixed all the ingredients in the wheelbarrow adding water slowly until the mixture was the consistency of oatmeal or peanut butter. The mix should hold together, be soft and malleable as putty, but not runny. We let the mixture sit for ten minutes to let the Portland cement react to the water.

We each made two hypertufa containers, one square and one round. The choice of containers was based on what forms we had available. Mary had large square styrofoam boxes from two Turduckens she had bought and used. As we found out, these were perfect forms for the hypertufa. They were strong and sturdy, and they had a top to cover the form.

We also used some inexpensive round plastic containers as forms.

The best forms to use are plastic, styrofoam, or cardboard because these are easy to remove from the dried hypertufa trough or container. Wood forms can be made to any form you desire, however be sure to line the wood with plastic for easy removal of the hypertufa container.
We carried the mix in buckets and plastic containers to our work area and began pouring it in our forms. The mixture must be packed tightly in the form to prevent air pockets. Sometimes it is helpful to use something to push against the side of the form.

We made a hole inside the form for planting and packed the mix very firmly.

The result is a very tightly packed trough.

We, then, covered the styrofoam boxes and put all the forms in separate trash bags. The trash bags seal in the moisture and allow the hypertufa to cure more slowly which makes for a stronger container. It is best not to move the forms because the hypertufa can be easily damaged at this stage. Because I had to bring my hypertufa home, we were very careful loading them into my car.
These must cure for about 36 to 48 hours in the trash bags. Remove the trash bags and the styrofoam tops. Now, the hypertufa must cure for about seven days uncovered and in the forms. Keep the hypertufa in a shady area away from rain to allow it to fully cure.
Remove the forms slowly and carefully. The hypertufa should be strong at this stage, but it is not fully cured. If you must use a knife or scissors to remove the form from the hypertufa, be careful not to damage the hypertufa container. For me, the styrofoam form came off fairly easily once I was able to pry the top corner away from the hypertufa container. The plastic was a bit harder to get the first cut, but once I did the plastic peeled right off. At this stage, the hypertufa is at a soft enough consistency to smooth corners or edges. Take a rasp or large screwdriver and gently smooth any corners or edges. Leave the hypertufa containers in a protected and shady spot away from rain for about three to four weeks to fully cure.
These planters are naturally porous and generally do not need any drainage holes for planting. I used the square one for planting pansies:

...and the other as a decorative addition to the herb garden. The water drains out over time.
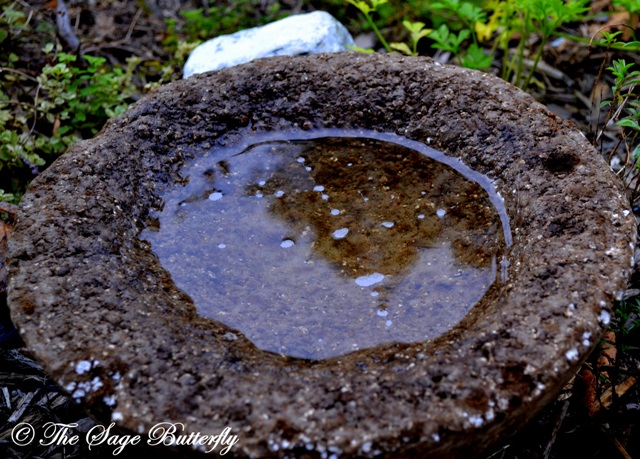
Many people plant succulents or carve shapes and designs into the sides of the hypertufa and use them as decorative features in the garden. Next year, I may try some other recipes and other forms of hypertufa. Thank you, Mary, for the invitation and the lesson.
Note: The Sage Butterfly is featured in the Best of the Web series by Be @ Home. The Be @ Home blog offers ideas and tips on home and garden decorating and cooking. Some of their most interesting posts include Entertain in Your Own Backyard and Decorating With Garden Fairies.
©Michelle A. Potter